Drag and drop
Learn how to create and configure automated testing workflows in EZ Testing.
Overview
A workflow in EZ Testing is a sequence of automated testing steps that can be executed together to validate your application. Workflows help you organize your tests logically and run them consistently across different environments.
Prerequisites
- Active EZ Testing account
- Basic understanding of your application's testing requirements
Step-by-Step Guide
1. Create a new workflow
- Launch the EZ Testing program and login
- Click on "Workflows" in the main navigation menu
- Select "Create New Workflow" from the workflow management page

Figure 1: Workflow management interface
2. Define Workflow Steps
-
Plan Your Workflow: First, identify and list all the steps you want to perform in your testing workflow. Think about the sequence of actions needed to test your application thoroughly.
-
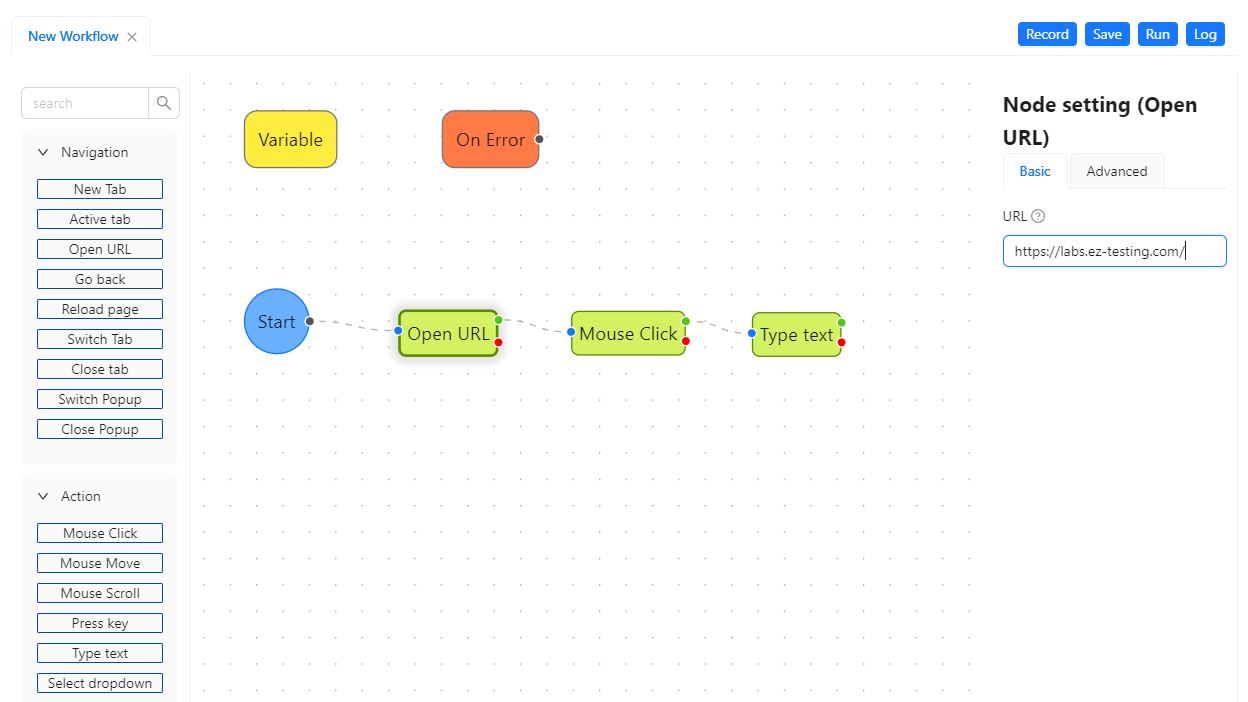
Add Action Nodes: For each step you identified, drag and drop the corresponding action nodes from the toolbox into the workflow container. Select available node types from the list of nodes on the left menu.
-
Configure Node Parameters: Set the necessary parameters for each node you've added.
-
Connect the Workflow: Link your action nodes together by connecting them in the correct execution order. Draw connections between nodes to create the logical flow of your testing workflow.

Figure 2: Workflow setting interface
3. Review and Save
-
Review Configuration: Carefully review your complete workflow configuration to ensure all nodes are properly connected and configured with the correct parameters.
-
Save Your Work: Save the workflow by clicking the "Save" button in the toolbar or use the keyboard shortcut Ctrl + S.
-
Name Your Workflow: Enter a descriptive name for your workflow in the dialog box that appears, then click "OK" to complete the save process.